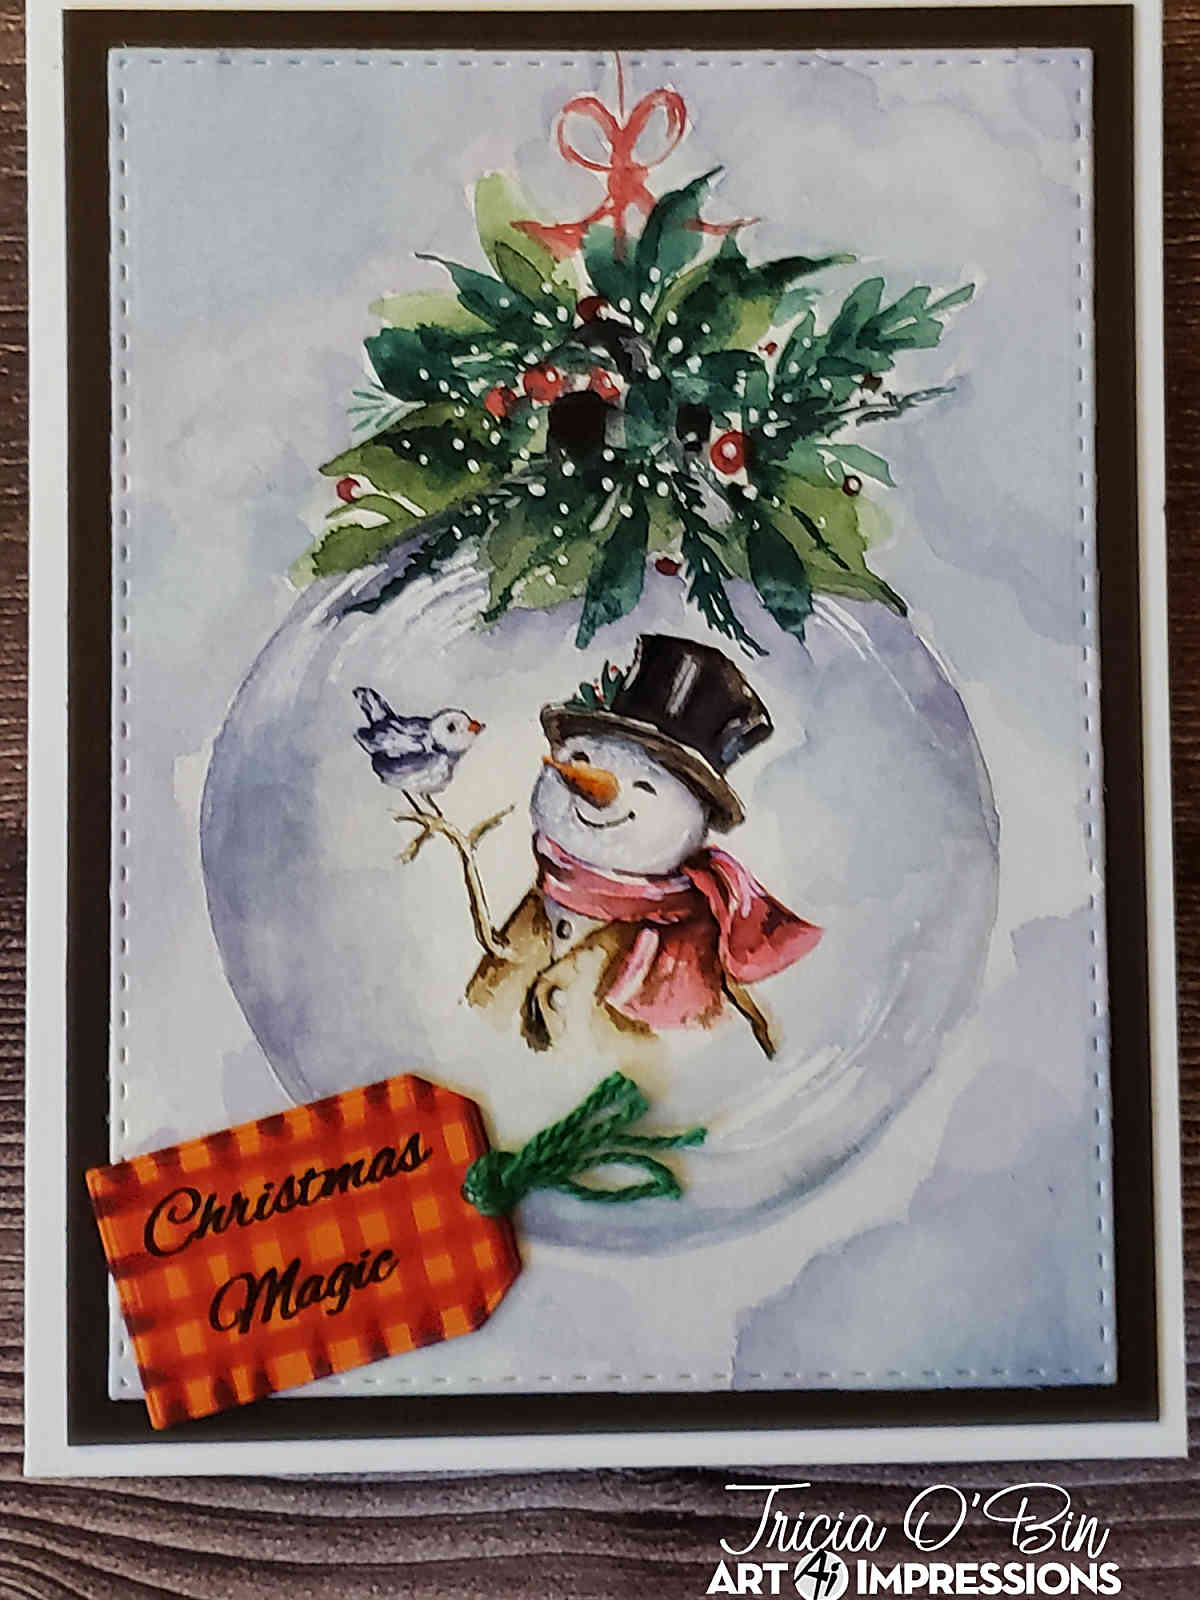

Welcome Back Watercolor Fans! I am so excited you decided to join us again for an all inspiring weekend. I chose to create a Christmas Magic Ornament card (still stuck on these new images and the Christmas in July theme is OK with me to get a jump on my list.).
To begin, I used some awesome painters’ tape that I got from Let’s Make Art. I wish I had cut it down first, so I had the border around it, there’s always next time. I painted the glass ornament and topper using Daniel Smith paints and Canson watercolor paper. Sandy Allnock inspired and taught me with her Watercolor glass ornament with Christmas berries tutorial on youtube, go check it out! It is sooo easy! I added some post-it tape in the middle of the ornament, where I placed my image, to protect it while I painted.
Once it was completely dry, I broke out my Art Impressions NEW snowman stamp from the latest release. I inked just the top half of him with a couple of colors. First, I added 569 from his top hat to the top of his scarf only (not including his branches). I also added it to the bird. Next, I used my 969 and added that to the birds’ legs, the branches, his jacket and the bottom half of his scarf and a small amount on his eyes, nose and mouth. I continued adding some to his hat. TIP: I wish I had rubbed some ink off where I placed the greenery on his hat, so it was more prominent, again next time! I stamped it off and stamped it in the middle of the ornament. I pulled the color out of the lines and added some additional color from my palette.
If you let each layer of color dry completely, you can build up some nice shadows. Did you know that complementary colors on the color wheel allow you to build nice shadows? For example, if you are using a red to color the scarf, you could layer in green to get some nice shadows. Remember, make sure your darkest colors are in the shadowed areas and you leave white space and highlights.
Once the card was complete, I cut it with my rectangle stitched dies and added it to a Gina K Designs dark chocolate mat. I cut the tag from the new Journal dies set from a piece of Gina K Design Tangerine Twist card stock (yes, you read that right, orange…stay with me). I hand-drew a criss cross design using 856, then using 847 just on the outside of the words and the 757 just along the edges. I used the new Christmas sentiments set for the “Christmas Magic” (I cut it apart so I could stack it onto the tag). A little green embroidery floss and voila!
This card was so fun to make I painted (not put onto cards yet) 3 of them in one sitting! It was so much fun. I love it when I have time to paint my Christmas cards without the rush of the impending deadline to get them into the mail. It makes a more peaceful process and experience. It doesn’t always happen but I certainly love when it does.
Well, once I again, I thank you for spending some of your weekend with me and the watercolor crew. We love to see all of your wonderful watercolor projects and hope that you will come back next time! Have a crafty day!
![]()
SUPPLIES: