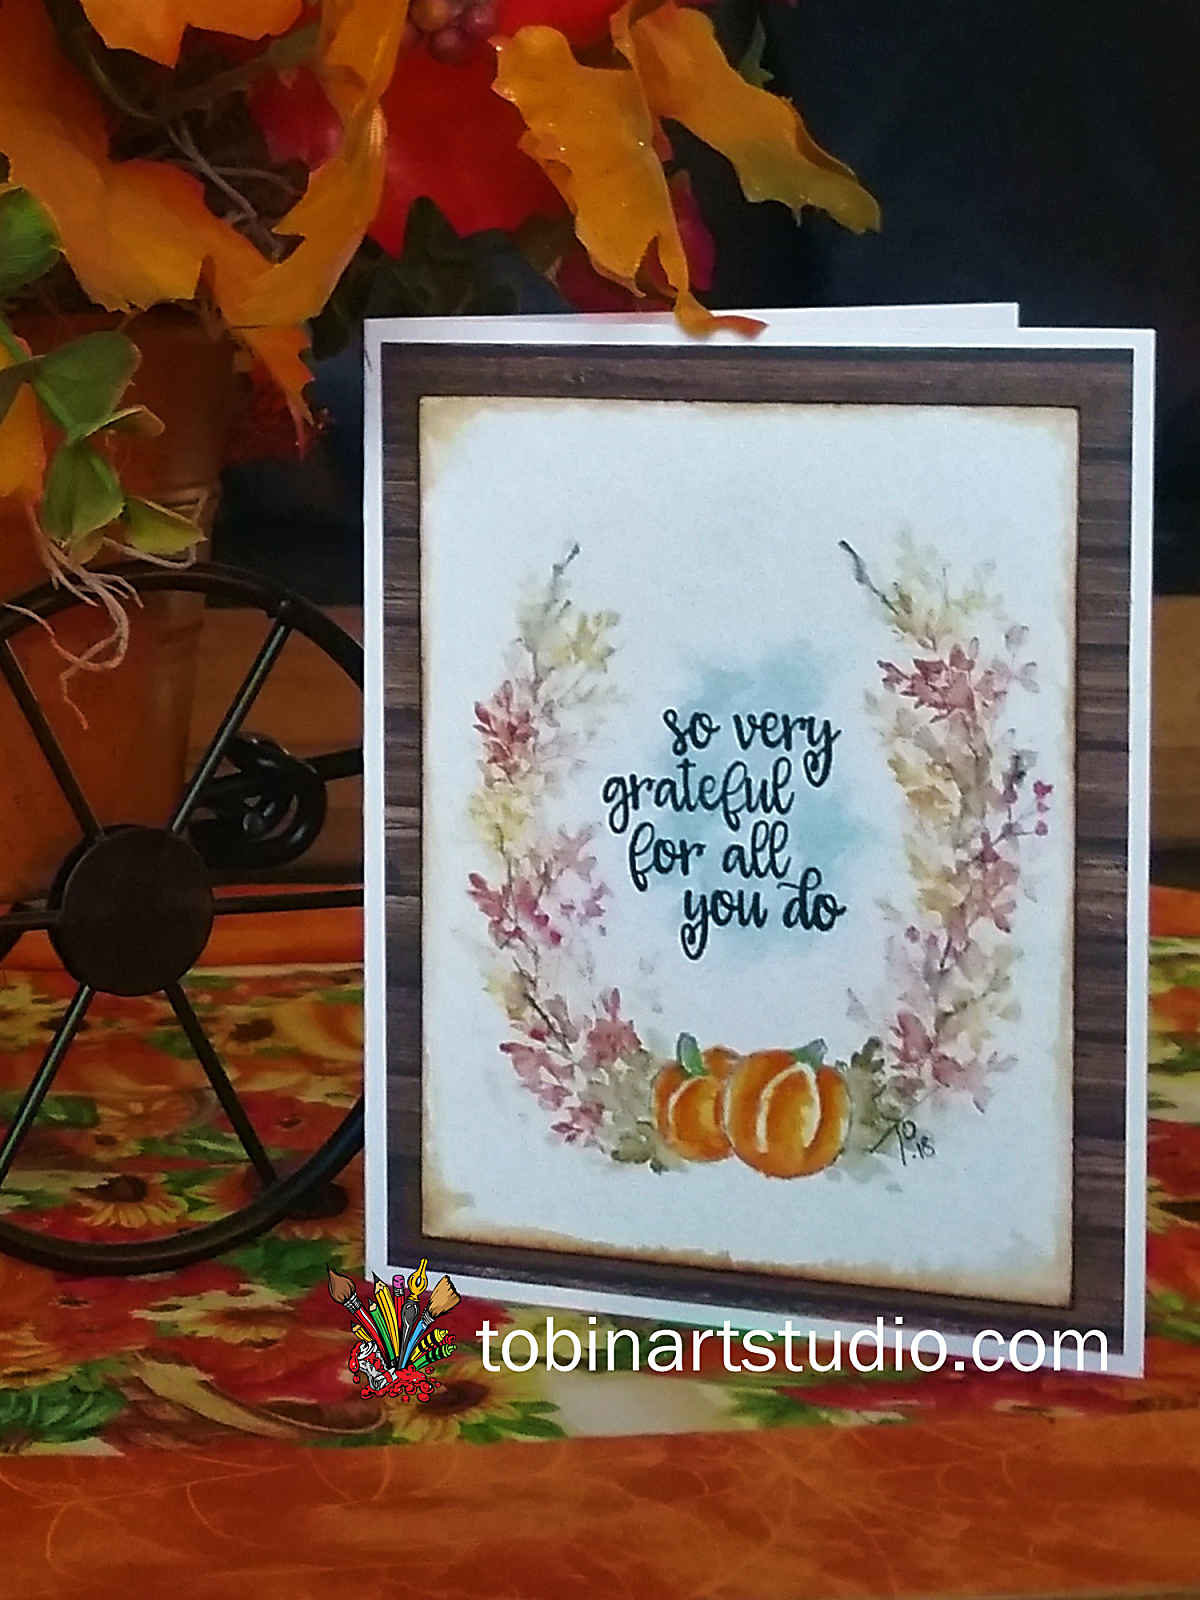
For my project for Art Impressions Watercolor Weekend, I chose to create a Grateful Wreath in honor of the upcoming Thanksgiving holiday. I have created a quick video if you are interested in seeing how I created this card.
Step 1 – Create A Guide
In order to create a symmetrical oval, I traced the inside of an oval die lightly onto my watercolor paper with a pencil. Keep this light so it doesn’t show through your design.
Step 2 – The Pumpkins
Stamp one of the pumpkins at the bottom of the oval using the stamp positioner in Sepia. Cover the pumpkin with a mask and using the stamp positioner, stamp the other pumpkin next to the first. (In the video you will notice I did all of the stamping and then added the color and water.)
Pull the color out of the lines, be sure to leave white space. This will create nice shadows.
Using the watercolor palette, Add some Olive Green to the stems of the pumpkins and Brilliant Yellow to the highlighted areas. Layer Orange where the darkest areas would be. Again, be sure to leave white space in the highlighted areas. Use the fine tip of the Sepia pen to darken the stems and add shadows to the pumpkins.
Step 3 – The Foliage
To create some interest, I used a flower from the flower set as a leaf. I inked it up with Olive Brown and stamped it several times on each side of the pumpkins.
I added some branches using the top of the branch inked with Sepia. I stamped it randomly on either side of oval leaving white space.
Using the vine, I stamped it several times inked with Brilliant Yellow and Brown.
I then added a branch with berries from the Mini Flower set inked with Sepia and Red.
Dip your brush into the water and pinch it off. Work your way around the foliage using the side of your brush and dabbing (not painting) each of the leaves.
Add some blue to the middle of the oval where the sentiment will be stamped to add more interest.
Step 4 – Stamp the Sentiment
Place your watercolor piece into the MISTI. Position your sentiment in the middle of the oval. Using black ink, (I like Gina K Designs amalgam ink) stamp it onto the watercolor piece.
Step 5 – Distress the Edges
Rub Vintage Photo Distress Ink against the edges of the watercolor piece. Using a paint brush and water run the brush along the edge, the water will pull a small amount of color along the edge to give it an aged look.
I added this piece to a piece of designer paper cut to 4 x 5.5. I added the whole piece to a card base made out of Neenah Solar White cardstock.
Related: https://www.tobinartstudio.com/watercolor-weekend-thankful-pumpkin-trio/
I hope you enjoyed today’s project, make sure you join my fellow design teams members on the Art Impressions Blog this weekend. We can’t wait to see your projects! Tag us on instagram (#AIWatercolor, #WatercolorWeekend).
Have a crafty day and see you next time!
Supplies:

Very pretty
Thanks Colleen!
Love it. Wish you had a video of how you made it on u-tube..
Thanks Edna, there is!!!! 🙂